Our only business is borescopes
Which makes us the industry leaders in borescope sales and service.

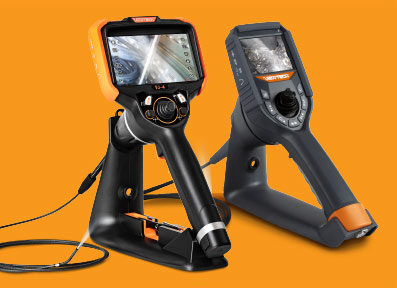
Video Borescope Piping & Weld Inspections with a Centering Device – ViewTech Borescopes VJ-3 & VJ-4
As a worldwide leader in remote visual inspection and video borescope technology, ViewTech Borescopes 6.0-millimeter mechanical articulating video borescope is commonly used in applications where orbital welds, piping or tubing is needing to be inspected. Many technicians find it helpful to utilize a centering device during these inspections.
A centering device is designed to allow the insertion tube, camera, and lights of the borescope to be lifted within the inspection area, providing a better perspective to look down and forward within the inspection area. This video will show you how to properly install a ViewTech video borescope center device and demonstrate how it can assist with your borescope inspection, maintenance, or quality assurance procedures.
ViewTech borescope centering devices are available in 3 different sizes.
First – A ¾ inch centering device, optimum for piping at least an inch in diameter
Next – A 1 ¾ inch centering device, optimum for piping at least 2 inches in diameter and
Finally – A 2 ¾ inch centering device, optimum for piping at least 3 inches in diameter
ViewTech borescope centering devices are made from a lightweight material and consist of 3 parts, which we will refer to as parts A, B, and C. At first it can require several attempts to gently align the notches and interlocking pieces when assembling and disassembling the center device behind the bending section of the video borescope.
To Begin
Never install the centering device over the bending section where articulation would be prohibited and could cause damage to the insertion tube.
Start with part a, placing it directly below the bending section, which is point defined by the chrome coupler. Next, slide part B into position, firmly connect the two interlocking pieces together as demonstrated. After parts A and B are locked, carefully line up part c with the notches on the inside of part c and the tabs on parts A & B. Finally, turn part C in a clockwise direction until the groves on the exterior match up to secure the centering devices in place.
It is always recommended to be gentle when removing the centering device from the insertion tube as it will be securely attached.
First, carefully twist part C in a counterclockwise direction to unlock it from parts A & B. Next, pinch together parts A & B with your thumb and forefinger and gently wiggle part C up and away from the insertion tube and bending section. Then unlock pieces A&B.
It is helpful to always store your centering device assembled, preventing one of the parts from going missing.
Download the ViewTech Borescopes Centering Device Installation Instructions.
Call to speak with one of our knowledgeable video borescope experts for more information on utilizing a ViewTech video borescope and centering device for your application. You will quickly realize why ViewTech Borescopes is the number one seller of video borescopes in North America.
Demo Heading


Success Story
See the VJ-4 in Action
Meet our team and test drive our borescopes at upcoming tradeshows, conferences, events and symposiums.

Over 15 Years of Experience
The ViewTech Borescopes team was established in 2008 with the goal of bringing affordable, high-quality video borescopes to the market.
Request a Free Demo Unit
Check the box in the form below and one of our representatives will arrange a free demo unit.

Call Us at 231-943-1171
– Or –
Fill out the form below and one of our representatives will contact you.
