ViewTech Keeps Their Clients Informed With Video Borescope Updates and Informational Videos
Our only business is borescopes, which makes us the industry leaders in borescope sales and service.
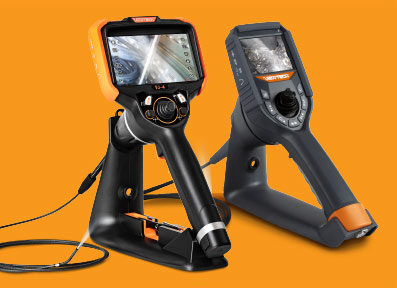
VJ-4 Video Borescope Report Maker Program
ViewTech Borescopes VJ-4 Video Borescope Report Maker Program Video Tutorial
ViewTech Borescopes VJ-4 Video Borescope Report Maker Program Video on YouTube
ViewTech Borescopes Report Maker Program – PDF USER GUIDE
ViewTech Borescopes is the leading provider of articulating video borescopes in North America. ViewTech’s new VJ-4 video borescope combines cutting-edge imaging technology with an intuitive user interface. Now ViewTech’s Borescope Report Maker program easily facilitates and generates a Microsoft word document featuring the saved images from your VJ-4 inspections. This tutorial will take you step-by-step from downloading the software to saving your ViewTech Borescopes Report Maker report, flagging images, adding comments, processing image flags.
Before we begin, this is a WINDOWS-based program and is not compatible with Mac Operating Systems. It will require Microsoft word already be installed on your computer.
A helpful tip, with complex inspections, it is beneficial to build and organize your VJ-4 borescopes folder structure in a parent / child or folder / subfolder structure like that displayed on the screen. Image folder directories can be created and renamed using the VJ-4 interface, or it may be easier to create the file structure on a computer and transfer the structure to the SD card, then insert the SD card into the SD card slot on the VJ-4.
First, to begin downloading the Borescope Report Maker program, click the link provided to open the Install browser. Then select Install for the Application Download to launch, followed by clicking Install to begin downloading. Once the Borescope Report Maker program has finished installing, a window will display requesting that you copy and paste or enter the 37-character license key, including the 4 hyphens, and then select Continue. A shortcut to launch the Borescope Report Maker program will be available on the computer’s desktop.
When first opened, the Borescope Report Maker program allows users to select from two options – Generate New Report or Process Existing Report.
We will start by selecting Generate New Report. The next step is to populate the Inspection, along with Inspector details. If desired, Watermark Settings allows the option to select an image or display text on the lower left corner of each page of the report. Start by selecting the Watermark Type, upload an image or type the desired text, then set the font size and transparency level and select save.
Prior to selecting the Images Folder location, all folders and images for the Borescope Report Maker should be transferred from the SD card to your computer or by removing the SD card from the borescope and inserting it into the computer. Next locate the images folder and select Browse, highlight the folder and Select Folder. Now Save Report As will require you to locate the file where the borescope inspection report will be saved and input the desired file name and click save.
After all the information has been populated select Start Job to generate the initial report. A dialog box will appear stating “Report Generated Successfully”. After selecting OK, a Microsoft Word document will open with each page displaying one inspection image. When reviewing your report, both images can be flagged, and comments can be inserted.
Reasons users may want to flag an image and include comments:
- To make note of defects or other areas of concern in an image.
- To point out questionable images that may require more investigation.
- To denote images showing excellent component condition or quality workmanship.
- To review the status and durability of a prior repair.
After the initial report has been generated, the option is available to further processes the report to exclude all non-flagged images, adding hyperlinks to each flagged image or excluding all non-flagged images. When selecting Include Flagged Images Only, followed by Process Image Flags, a new Microsoft Word document will open and will exclude all non-flagged images from the report and inspection summary.
Next, if a report has previously been created and saved, Select the Process Existing Report button. Locate the saved Borescope Report Maker file and select open. Users can process the report to include flagged images only and then select Process Image Flags. The option is available to Select Process Existing Report, locate the saved Borescope Report Maker file and then Process Image Flags which will include all the original report inspection images.
Finally, clicking Back To Summary will return to the Borescope Report’s Inspection Summary page.
The best way to experience the new VJ-4 video borescope is with our free in-hands demo program. Call to speak with one of our knowledgeable video borescope experts and we will help find the best borescope for your inspection needs. You will quickly realize why ViewTech Borescopes is the number one seller of video borescopes in North America.
Demo Heading


Success Story
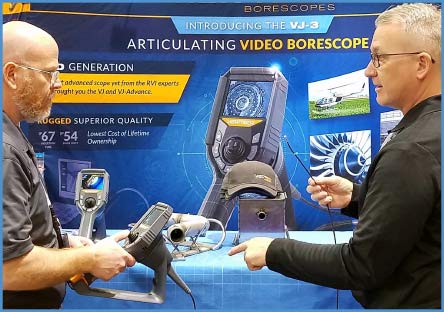
See the VJ-4 in Action
Meet our team and test drive our borescopes at upcoming tradeshows, conferences, events and symposiums.

Over 15 Years of Experience
The ViewTech Borescopes team was established in 2008 with the goal of bringing affordable, high-quality video borescopes to the market.
Request a Free Demo Unit
Check the box in the form below and one of our representatives will arrange a free demo unit.

Call Us at 231-943-1171
– Or –
Fill out the form below and one of our representatives will contact you.
